Thursday, 3 May 2012

Conclusion

The module was defiantly interesting and challenging to do, as it was interesting to see if I was able to show an Italian surroundings and the models needed. Getting used to modelling was a hard concept to understand in the first place, same when understanding the ways to animate, but as soon as I understood what I could do on the software then some things became a little easier to use. 

I think that I had done quiet well on the modelling part of the module, considering that this is my first time using 3D Max. Some of the buildings were tricky to do, mainly the arch way, the bird was fairly easy once I had understood how symmetry worked and the flying machine turned out better than I imagined once I understood that the leaf tutorial has great use in everything. If I was to do the modelling again, I would focus on more detail on the buildings, making sure that they would actually look like what I'm referencing to, as well as make sure that the materials worked better on the buildings and on the  plates.
                                             
The animating was very messy when working with it, mainly for the flying machine and the biped within the flying machine. For the bird, it was easy to animate as I just made the wings go up and down before placing the bird on a path to follow. I properly could have done that for the flying machine and the biped but the movements wouldn't always be continuous since the flying machine would fall at the end and that the biped starts with holding the flying machine up in a different way to when it was flying it. Because of this, the flying machine and the biped ended up being animated from frame to frame, which was very time consuming and it made the model fall apart at worst times. I think if I was to do this again, I would group more of the flying machine together so that bits and pieces don't end up everywhere or so that the wing doesn't end up doing the complete opposite to what the other wing did. I think I would also make the movement of the biped better and actually sort out a mesh body that the biped could go into, since I managed to break his thumb off without even realizing it.

The lighting of the scenery was good, especially the sun, the only thing I think I could work on is the shadows as they came out patchy in the animation, not making it clear if it was the shadow or the render decided not to do that part of the animation.

And the end of it though, I'm pleased with the work, considering that it was my first 3D work. I hope that my skills within 3D Max and possibly Maya in the future will get better.


Wednesday, 2 May 2012

Rendering and Sound

With setting the right settings and making sure all of the material I needed was collected, I had rendered the clips needed and began to place it all together in Abode Premier. While editing the clips together, making some longer in time as the frames were too short, I quickly gathered some music from my Uncle and some from the assassin creed games, which had covered the Italian era, as well as some sound effects, such as the birds and the movement of the wings. It was a bit tricky to find the sound needed, making me wish that I had gathered the sound beforehand but all of the work is now complete.

Tuesday, 1 May 2012

Beginning of Rendering :D

I have began to render my animation!! FINALLY!! After completing the animation of the flying machine, I am able to start setting cameras out and begin to render my scenes. Though to get all of the render clips will take a while, I can focus on blogging and quickly finishing other work as well as getting the song choice for the 3D animation itself. For the music, I have decided to get something slightly comically sounding as the animation is aimed to be funny, this includes getting sound effects that will make you giggle. I will also need to start on my reference list for the 3d work....I can only imagine it being a LONG reference list.

Tuesday, 24 April 2012

Animation Progress and theory of flying machine movement

That thatb the setting is done, I can focus on the movement of the biped and the flying machine within the animation. From the design of the flying machine, it would seem that the biped would have to move in a certain  way for the flying machine to move its wings. From looking at the design, it would like the biped would have to pull his arms and legs in when it wants the flying machine wings to go down and then have its body flat out if it wants to get the wings to go up. This certain way of movement will be interesting to see and entertaining when it flys the flying machine in the wrong angle.

Here is a screenshot of working on the animation of the biped grabbing one of the handles on the flying machine.

Tuesday, 17 April 2012

Process with work

From working with the biped to sorting out the lighting for the scene to animating the first bird, the scene is coming along smoothly. The biped will need to be placed as if holding the flying machine before going to animating it. The bird has a path and is animating, all i have to do is to clone the bird and the path. I created a path using the line tool, connecting the bird was simple enough. With the planes that surround the scene, I used the leaf tutorial once more so that the buildings remained, allowing the sun to be seen setting in the distance. This is what this look like at the moment....

Work in Process: Lighting

As the scene is being set up, I wanted to try and create a sunset for the animation. This is what I have gotten so far following the daylight tutorial.

I currently like the lighting in the thrid picture but I want to try and make it look more reddish like a sunset is, but if I can get that then this will have to do as well as the sun is now in the right place.

Tuesday, 20 March 2012

Town Square

I have completed the town square for where my scene will take place.

Using plates as background images, it managed to create the scenery behind the scene. I made the houses smaller to make it to scale of the town and created a seating area in the middle of the square, where the brushes are ready.


Tuesday, 13 March 2012

Work in Process....

During class, I had finished making the buildings for the town and made a screen shot of the town in process. I might change the size of the houses as they look a bit too big

Morpher

Today, we went through making facial animations with a basic head. We made three copies of the head given and gave each of the copies an certain action, from closing their eyes to making the head smile. We placed the channel effect on the orginal head, allowing easy animation on the head. This will properly be a technique that I'll use for the animation.

Monday, 12 March 2012

Work in Progress.....

After making the storyboard, I have been making the town square in classes while I try and make my man from home. From using youtube tutorials, this is what I have got on my man at the moment.

Using the same technique as the dove, I had used symmetry on the person so I could do two sides at once. I still need to make the feet, hands, head and 3D styled hair ^^ Then the clothes to go on top. I'm hoping I can get this done. If not, I will use the biped as a back-up.

The town square is nearly done, just need to finish modelling the houses before I begin to place them everywhere and try to sort the lighting out on the set. Joooooooyyyyyyy!!! Ohh, I also need to sort out the brushes in the square.

I guess it would be nice if I can get everything done, to have everything made fresh and to get it animating.

Tuesday, 6 March 2012

Storyboard-First Flight

Now that the three models have been handed in, I have created a storyboard for my 3D animation.

The idea of the storyboard is that this is the first test flight of Da Vinci's flying machine within the city of Milan. From some research, it is said that the flying machine can be a good guilder and without any hot air to push it up, the flying machine will simply fall. So I decided recreate the first test, that the flying machine didn't work in a comical way.

Shots

(Create sketchbook like title before fading into scene)

1: Angle: Medium Shot at arch building.
    Transition: Fade in
     Info: Shot of Arch building in Milan, a man is seen staying on the top of the building.

2. Angle: Medium Shot at the back of the arch building
    Info: Shot of the man on top of the arch building, viewing the town square below.

3. Angle: Medium Shot of the man in the flying machine.
    Info: The man stays there, fully fitted in the flying machine.

4. Angle: Close up Shot of the man.
    Info: Made is looking at the city in front of him.

5. Angle: Close up shot of the man.
    Info: Dove flies pass the man

6. Angle: Close up shot of man.
    Info: Man watches the doves with awe.

7. Angle: Medium shot, behind the man.
    Info: The doves fly freely into the sunset.

8. Angle: Close up shot of the man's foot.
    Info: Man pulls his foot back, pulling the rope that's attacted to it.

9. Angle: Wide shot of the flying machine
    Info: The man tests the wings, making sure that they more up and down, like wings of a bird.

10. Angle: Extreme Close up shot on the man's mouth.
     Info: The man cockliy smirks.

11. Angle: Close up shot on the man's foot.
      Info: The man begins to run.

12. Angle: Shot poining from the side of the arch building, upwards.
     Info: The flying machine jumps off the arch building

13. Angle: Wide shot of the scene.
     Info: Flying machine begins to flap, trying to follow the doves in the light of the sunset, tinting the flying machine instead of flying.

14. Angle: Close up shot of the man
     Info: Man halts as he realises something its wrong.

15. Angle: Medium shot of the flying machine.
     Info: The man starts moving his legs in a comical way, making the wings flap.

16. Info: Man falls

17. Info: Man Crashes

18. Angle: Shot of scene
     Info: Man has fallen in a brush, the flying machine in pieces.

19. Credits

Thursday, 1 March 2012

Conclusion- Modelling

Ever since starting this assignment, I have had a bit of trouble trying to get used to the program, considering that it was something completely new and it's an obstacle to overcome in the beginning. It took about a couple of weeks to finally get over the obstacle and start learning what the program could actually do when it came to the three models that had to be created.

Out of the three models, I think that the flying machine looks the best, because it looks the most realistic and it is the one that is the most closest to its orginal design. The one that took the most effects and tools in 3d Max would have to be the building, though all of those effects were very useful in getting used to the program. Surprising, the dove seemed to be the quickest and the easiest to do, with learning about Symmetry and understanding about the shape of the bird, which actually helped me understand why the first flying machine may have not worked.

If I could have do the models differently, I would try and make the dove more realistic looking and not looking like something off Pingu, the TV show, but I still like the style overall, just not for this assignment. For the building, I could try and add more detail to it, though it looks detailed enough already, there are some little things that I noticed near the end of the modelling that I wished I added.

From making the models, I have learned a good amount of skills that will be useful when making the animation in the weeks to come.

Model Three: Building in Milan

This is my three and final model. I'm not sure why the screenshots had decided to brighten up the model but I didn't have the time to figure it out '^^.


The model was based on this picture...


The reason I chose this building for my model is because this will be the building where the person (a.k.a. Da Vinci) will try out his flying machine for the first time, seeing the town square and the rest of Milan at his sights. It also gave me the practice to use Boolean to create the shape needed in the building, therefore the rest of the buildings should be a breeze. For the windows, I drew the shape in Illustrator, making the stain glass and texture in Photoshop before making it into a material and placing it on a plane, similar to what I did for the wings on the flying machine. Here is the window.

The building was a bit messy to start with. To make the arch in the middle, I had to use a simple box and use the Bend Modifier to bend it to a 180 degree angle, then using the cut tool to cut some of the side off since it was showing too much. After that, I created three boxes, two tall ones next to the arch and one on top of it. For the side boxes, I used the Extrude tool to create the indent in the building, as well as using Bevel to create the indent on the side. I created extra boxes and adding the Bevel effect to point the edges out before placing them in the building. I did have trouble with the Bevel at first because I tried to use the Bevel on the actual main building, but the ledges seemed untidy and it seems to make the grid of the box messy. I made come Cylinders as the pillars at the egde of the indents, before MeshSmoothing the indent itself so that it didn't look so pointy. The material was a pain, having to use the UVW Mapping to rotate and orangise the texture, even having to go to photoshop a couple of times to add certain detail for the building, like this texture.


Tuesday, 28 February 2012

Model Two: Dove

Here is my second model finished and completed. My dove.


The extrude tool and the symmetry tool became very useful in making the dove, it was good praticse before I tried to make my human for my animation. It took a while to get the right shape of the wings, getting the size and shape to fit the body of the dove. The reason I chose to model a dove to go with the flying machine is because I plan to make the birds fly pass the person with the flying machine and contiune you fly into the sun in the sky, placing hope in the pilot before he takes off.

If I was to do the dove again, I would try and make the dove look less like it just came from the TV show, Pingu, and try to get some of the textures to look more realistic.

Camera

We finally get started on using cameras within 3D Max today. Using Ctrl+C to bring up the camera, we got used to positioning the camera in the place that needs to be before looking at the fuction buttons within the careman's viewing, which is done by simily pressing C. By creating a path, you can attact the camera to follow the path created, allowing the animator to make a nice point of view within a rollercoaster or even a person walking ^^.

Animation

Today, We learnt how to animate within 3D Max.Getting used to the auto key and the set key motions used within the frame slider to make movement to the items, such as making things slide across the area, similar to how a motion tween would work in Flash. The time configuration tool is useful as it allows to change the number of frames that appear in the timeline, and to change around the frames per speed, for any fast-slow motion bits. When we got to adding motion to a bouncing ball, we used the curve editor to change the speed of the object that is moving. To make multiple balls bounce at the same time, we used the Dope Sheet to change the levels of each item, so that they move at different paces but start at the same time.

Monday, 27 February 2012

Work In Process...

While applying some textures on my arch building in Milan, as well as thinking of the windows. I've started on my third and final model...a dove.


The bird seems a little easy now that I looked at a few tutorials on making people, I thought I could use the same way for the dove, making the human later on. I started with a symbol box and worked on half of the bird, adding extra parts by using the extrude tool and editing in poly to get the shape before using the symmertry tool to mirror. After checking that everything was in line, I applied the turbosmooth tool, turning the blocks into a more bird like shape. Turbosmooth looked too smooth though so I quickly changed it to Meshsmooth. I'm hoping to get texture to make the bird look more feather like as well as to plan to make the eyes and to change the color of the beak.
Tuesday, 21 February 2012

Model One: Flying Machine

Here are the screenshots of the finished model of my flying machine.


The frame for the flying machine was easy, just using different shapes such as the cylinders and tube shapes to make the shape. When it came to the wings, I made the leather wing in photoshop before placing it on a plane and using the editable poly to make it look more wing like, before using the line tool to make the frame of the wing. The same method was used for the tail, except, no frame was needed. The only reason I think that it took a while to do was because of having trouble with the wings, other than that, the flying machine can be very quick to make.

Working in process

I have currently been working on two of my three models for the last couple of weeks. One being the Flying machine and one being part of the building structure. I have been having a little trouble with the flying machine and trying to get the wings right on it since I am looking at the orginal sketch of the flying machine instead of the assassin creed's recreation of the flying machine. I should be able to get the wings right soon.

The second model was different to figure out, since just being placed on the program, I still haven't gotten used to its fuctions. But using the Exclude Tool, the cut and bend tool for the arch, and some smoothing, the building is slowly coming together.


This is the first attempt of the wing of the flying machine. As you can see, it is absolutely horrible. It looks too thick, it's hard the model and get in shape...no that it is in good shape anyways. I'm going to try and draw the wing again and use the same technique used for the leaves. Hopely, I can get the wings right.

Tuesday, 14 February 2012

Lighting

We tried messing around with the lighting today, mainly with shadows, the Onmi light and the target spot light. Onmi light is the light source at that point, so you can use this to create a flame on a candle. to place light on the scene. The Target Light is a spot light as the light is angled into a cone, this would be useful within a lamp or as typical daylight itself.

He is a picture of a pumpkin with the Onmi Light and the Target spotlight. Sadly, I did not make the lovely pumpkin but the Onmi Light is placed in the pumpkin to create the pumpkin's face in the ground while the green light is coming from above the pumpkin.

Tuesday, 7 February 2012

Textures

Today, we are learning about how to texture an 3D images and how to mess around with the lightning. From looking at the Material Editor, you can easily place images as a material and edit the way they look before applying them on the object that you want, whether it is an a whole object or needing the use of the multi-sub object tool to edit.


After messing around and getting used to the controls, incudings how to rotate the material using editable poly on the side of the shape, I started to try and create a roman like building, since I didn't save my supermarket. Some of the textures that I had picked didn't work at first but this is my first try with using materials, I'll properly need more work on it when the modelling for the coursework begins.


Looking more into the mapping tool, I started to make a leaf. First we quickly edited the leaf in photoshop so that we could create a transparent mask for the leaf when it enters 3D Max. After placing the leaf in and applying the mask so that the white background do not appear, the mapping tool was used to make leaf more reflexable, as the no of lenght and width was increased. Here is what the leaves turned up being.


Friday, 3 February 2012

Mood Boards

After looking at the inventions, I have created three mood boards, one of each invention that I am interested in.

 
From these boards, I'm still liking the idea of the flying machine, though I could achieved the same theme with the parachute and it would be easier to model.

Tuesday, 31 January 2012

Turning 2D to 3D

Extrude

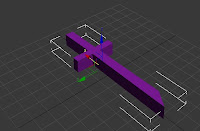
Using the pen tool in either 3D Max or Illustrator, we were able to learn how to turn a 2D image into a 3D one. First we tried dawing within 3DMax before going to the modifer list and selected the Extrude feature to make it 3D, similar to how I did the text for my supermarket last week. The first object was a sword.


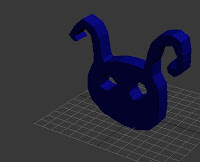
The second drawing was using Illustrator before importing the image and Extruded the image to make it 3D before resizing it. This time, I drew a cartoonish head from a game.
Lathing

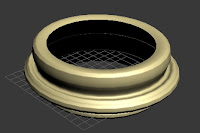
After that, we were told how to lathe an 2D image. Whether the user draws in 3DMax or Illustrator, the person will have to draw half the image. Me, at the time, didn't understand the concept fully and thought that I should try and create a ghost. After drawing your half a image, you rearrange the pivot poin to the egde of the image, where the lines end, and then apply the lathe feature, giving you a fully 3D image. While doing this, I watched as my ghost turned into a spinning top before turning into a hand bracelet. Earning a good half an hour of confusion and a sudden thought at the end thinking that this feature will be usful when making side items such as cups. This thing is madness I tell you!!

Loft

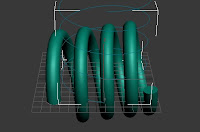
Next, we drew a spring like line, using the Helix tool and made sure that both of the radius were the same. Then, we drew a small circle and selected the circle (shape) to Loft in the Compound Objects. From there, you would link, 'select path' and then select the Helix line made, thus creating a 3D spring. From there, you can mess around with it and change the size of it, changing its shape.


Boolean and Pro-boolean

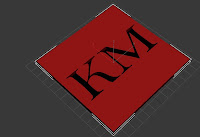
Now we are told to make letters imprinted in a box using either Boolean or Pro-boolean. From making some 3D letters from before and placing them within the box so that they were inside the box but was still popping out of the box, I went to compound objects where Boolean was. I tried using Boolean first but after following the tutorial, all I managed to do was change the colour of the box while the font disappeared or the bow just disappeared all together. But after using the Pro-boolean, I managed to get the letters to imprint into the box.

Array

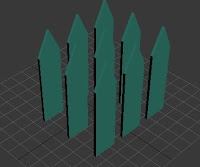
I quickly drew an fence and changed it to 3D before bringing up the array settings within the tools to make three by three worth of fences. This technique will be useful when cloning certain items, though I would just copy and paste the item from hand, unless I want to keep things in line.

Friday, 27 January 2012

Research

I have been looking at images and research of Leonardo Da Vinci, his drawings of inventions and the Italian environment within the 15th century. From some of the research gathered, Da Vinci was working within Florence before entering the service of the Duke of Milan in 1482. From the time of service between 1485 to 1490, Leonardo produced his research and designs, from nature to his inventions. For some of his inventions, Da Vinci could only design them as the idea for his invention would be unrealistic at the time, it was only after his death in 1519 that people started to take Da Vinci's inventions and knowledge in. Here are some pictures of his inventions from his sketchbook.

Da Vinci's inventions designs


At this time, I am not sure which design I might go for the assignment. I am stuck between the flying machine and the tank. The flying machine looks like an interesting project to do, as it would be interesting to animate the device within the air, but this will require to create a person as well. The tank's design seems easier to model but it would seem boring for the tank just to be moving and blowing stuff up. It's whether I want to try something with a challenge such as flight it self or stick to the ground with the tank.

The environmental design will be based within Milan since that was the time when Da Vinci began his designs. Because of this, I researched in some images of buildings and the way that Milan is shown from the 15th to the 21st century.

Milan


I'm not sure what I have planned yet for the project but I guess if I was to the tank, I would make animation powerful as it fires its cannons while if I went with the flying machine, I would try and animate with the sense of freedom, since at the time, man couldn't fly. I will have to sort my ideas out and design what I might want, as well as how I might go to creating the idea I choose.